Fall may just be starting, but now is the time to ask yourself a question.
Is your home snug and ready for winter?
There are so many benefits to making your home more energy efficient: it will feel more comfortable, indoor air quality is better, and energy bills can be cut by as much as 30%.
But how do you find the areas of your home that are sucking energy—and what can you do about them? Frost King’s How-To Video Series tackled this question with a video from the Handy Guys that shows how a few simple, inexpensive tests can help you find air leaks around your windows and doors and seal them up before cold weather arrives.
Put your home to the test—and do some easy DIY fixes that will keep you and your family more comfortable (and your heating bills lower) all winter long.
Test #1: The Special Delivery Test
Do your doors let hot air escape and cold air in? The “Special Delivery Test” can help you identify leaks using just a sheet of paper. With this simple test, you take a sheet of paper and try to slide it into the gaps between the door and the frame or threshold. If you can, these small gaps are costing you a lot of money in lost heat.
Fortunately, there’s a quick and inexpensive fix: add new weatherstripping around doors and replace the threshold with one that has a tighter fit. Not sure what you need? Watch this video to learn how to choose the right threshold for your entryway:
Test #2: The Flashlight Test
Another simple way to check for air leaks is the Flashlight Test. This test must be done at night when it’s dark; you’ll need a flashlight and a helper. After dark, go outside and shine a flashlight around all your home’s exterior doors and windows while someone inside looks for light shining through any gaps.
As with the flashlight test, you’ll need to seal gaps around window and door frames with weatherstripping and replace worn thresholds. And while replacing leaky windows is the best option for stopping energy loss, replacement windows cost big money. If new windows aren’t in your budget, Frost King Window Kits can reduce heat loss by as much as 35%. They’re easy to install and shrink tight and crystal clear. Watch this video for step-by-step installation tips:
Test #3: The Tissue Test
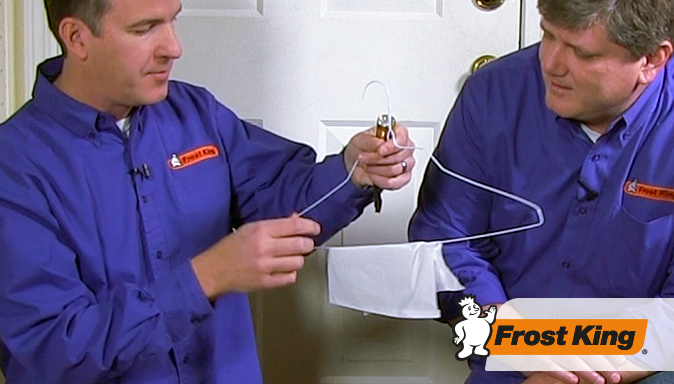
A third test to help you find air leaks is the “Tissue Test.” To do this test, just hang a paper tissue on a hanger and hold it up around the edges of windows and doors. If the tissue moves, you have gaps that mean your house is losing energy. This test is a great way to find leaks not just around windows and doors but anywhere your home might be letting in drafts: around exhaust vents and fans, baseboards, fireplaces, attic hatches, recessed lights, outdoor faucets, electrical outlets, and more.
If drafts are coming through outlets and switches on exterior walls, Frost King’s Outlet Sealers are easy to install and will keep out drafts. Start by turning off power to leaky outlets and switches, remove the cover, and add the Outlet Sealer over the face of the outlet or switch. Then just screw the cover back on and leaks are sealed.
Drafts from outdoor faucets are also an easy fix with the Frost King Foam Faucet Protector. Not only will it stop cold outdoor air from leaking into your home, the Faucet Protector protects outdoor faucets from freezing temperatures that can lead to burst pipes. As soon as you are done needing outdoor water for your yard, disconnect and store hoses then turn off the water supply to your outdoor faucet. The shutoff valve is usually located next to the main water valve in your basement or at the top of a pipe junction near the outside faucet. Drain any water left in the pipes and leave the handle turned to the “on” position, then attach the Faucet Protector by slipping the cord’s loop over the stem of the faucet and pushing the cover snugly against the wall. Pull tightly on the drawstring clip until it’s secure.
